

Making a repeat pattern is such a simple yet effective way to present your artwork or illustrations, and great for surface pattern design or textiles projects. Seamless tiled patterns always look impressive as you can't see where they connect, so the images can really flow together.
I used to make patterns with an old version of photoshop, and managed to teach myself the process of making a repeating tile. Nowadays, I have an iPad & Apple pencil and use Procreate, as so many illustrators do - it's a fantastic programme and honestly I've no idea how I did without it before! When making repeat patterns though, there's no offset tool like in Photoshop so you have to make repeat patterns a slightly different way. Once I cracked it, I found it even easier, and it meant I didn't need to constantly export my work between Procreate and Photoshop.
So here's a quick little tutorial on how I make repeat patterns! Hope it's helpful!
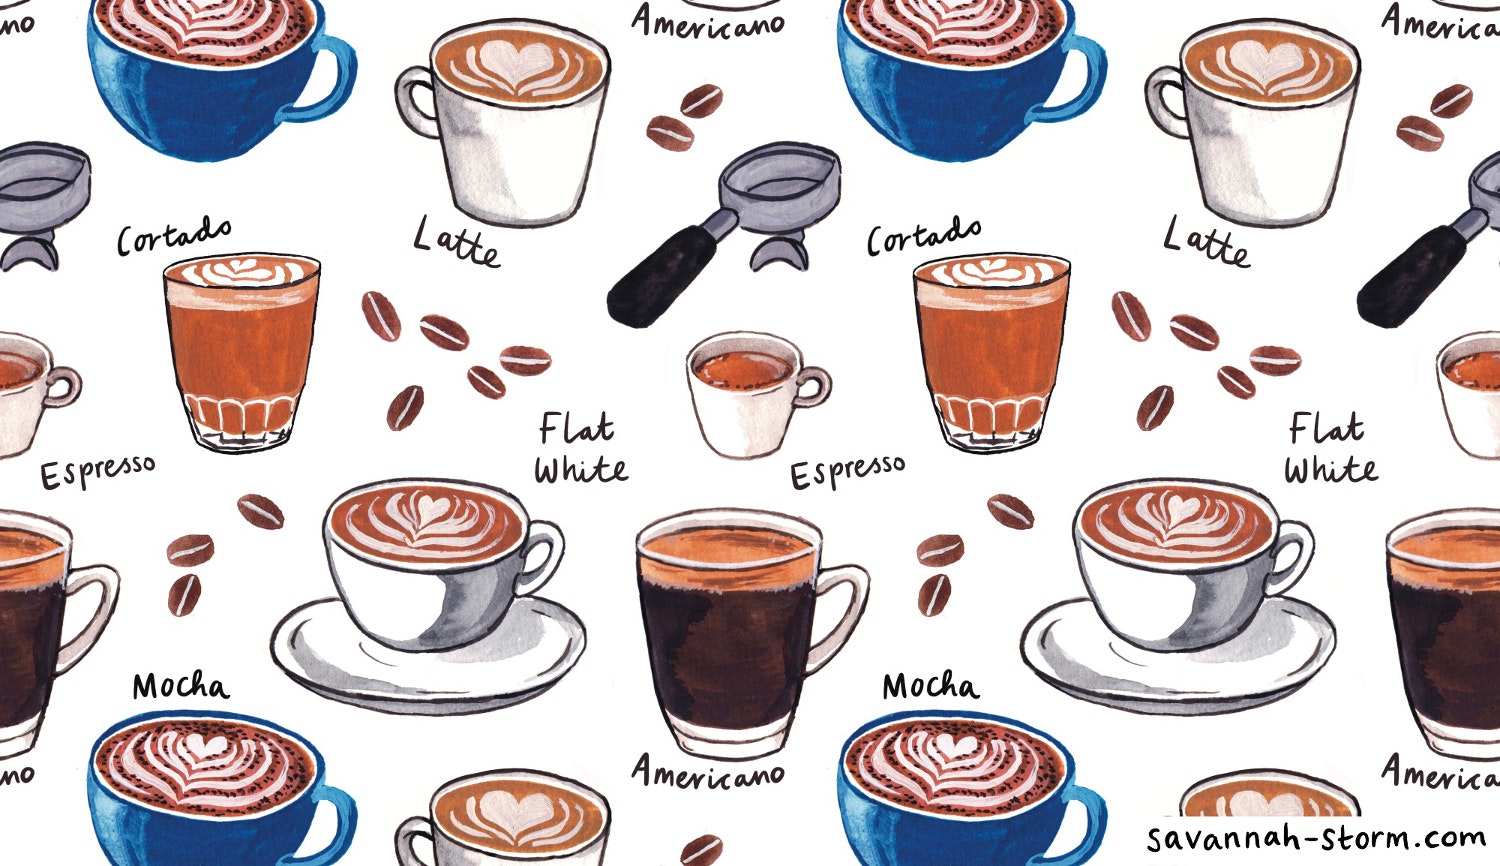
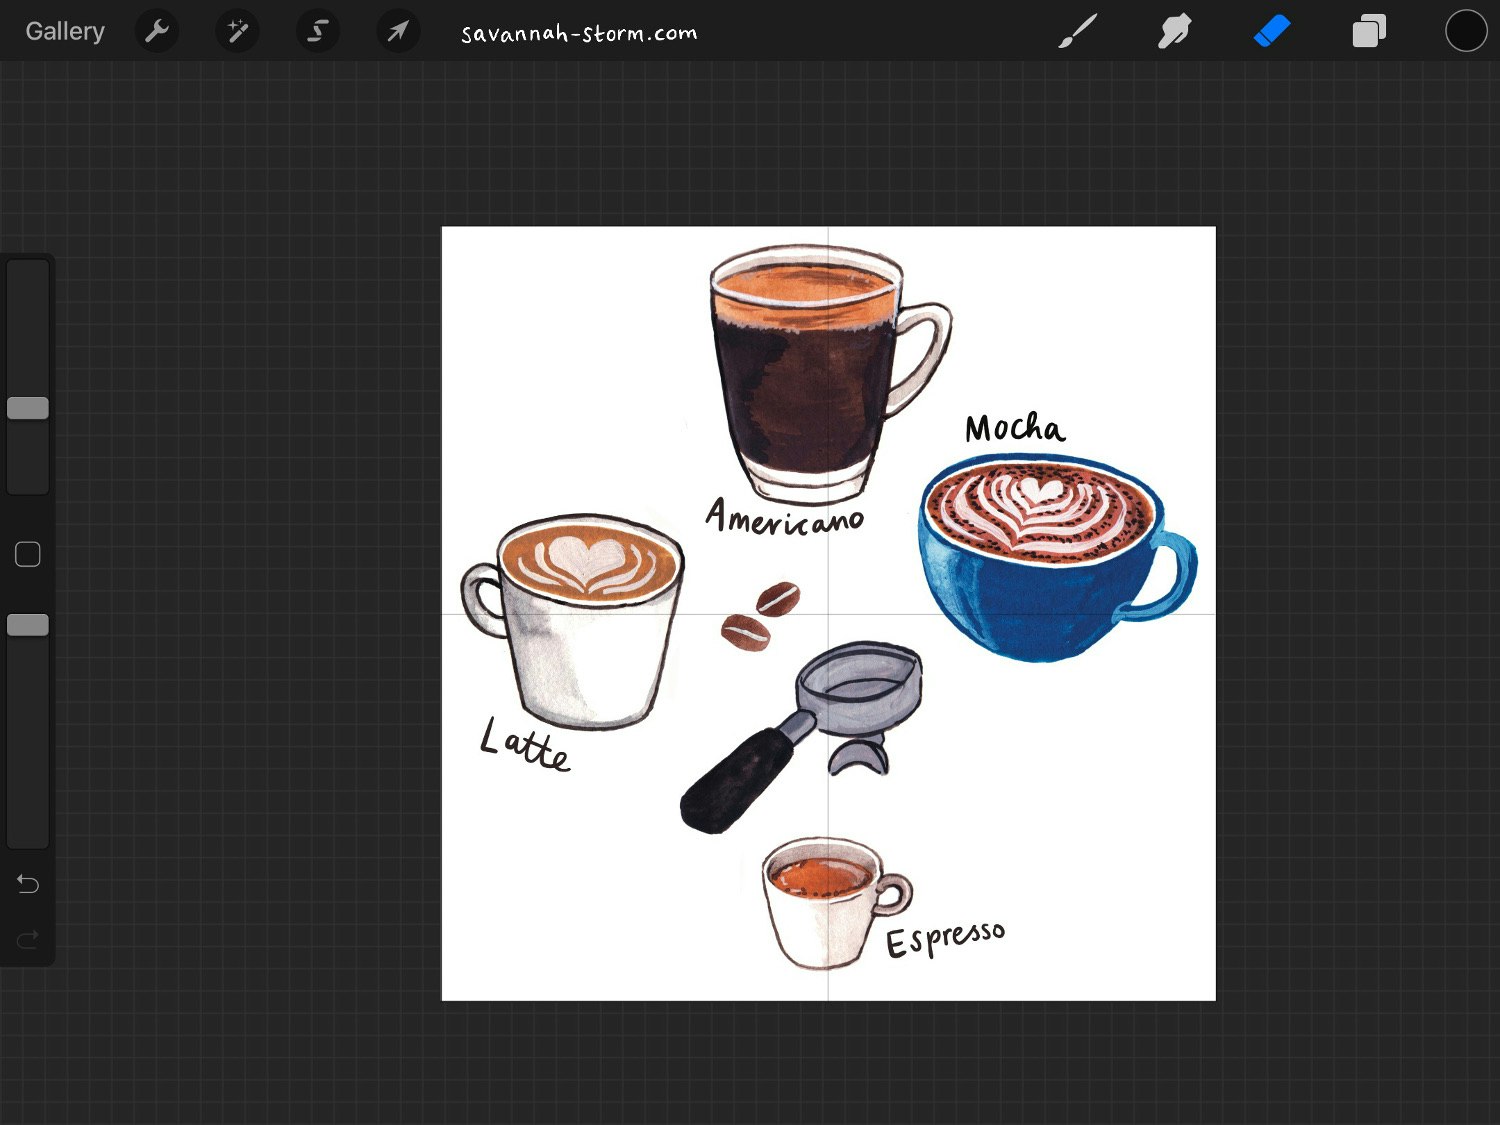
Above is what my finished pattern looks like, so you can visualise what we're aiming for. I used some of my coffee illustrations as they're all quite nice shapes and sizes, and the coffee beans and writing are useful smaller elements to fill gaps.
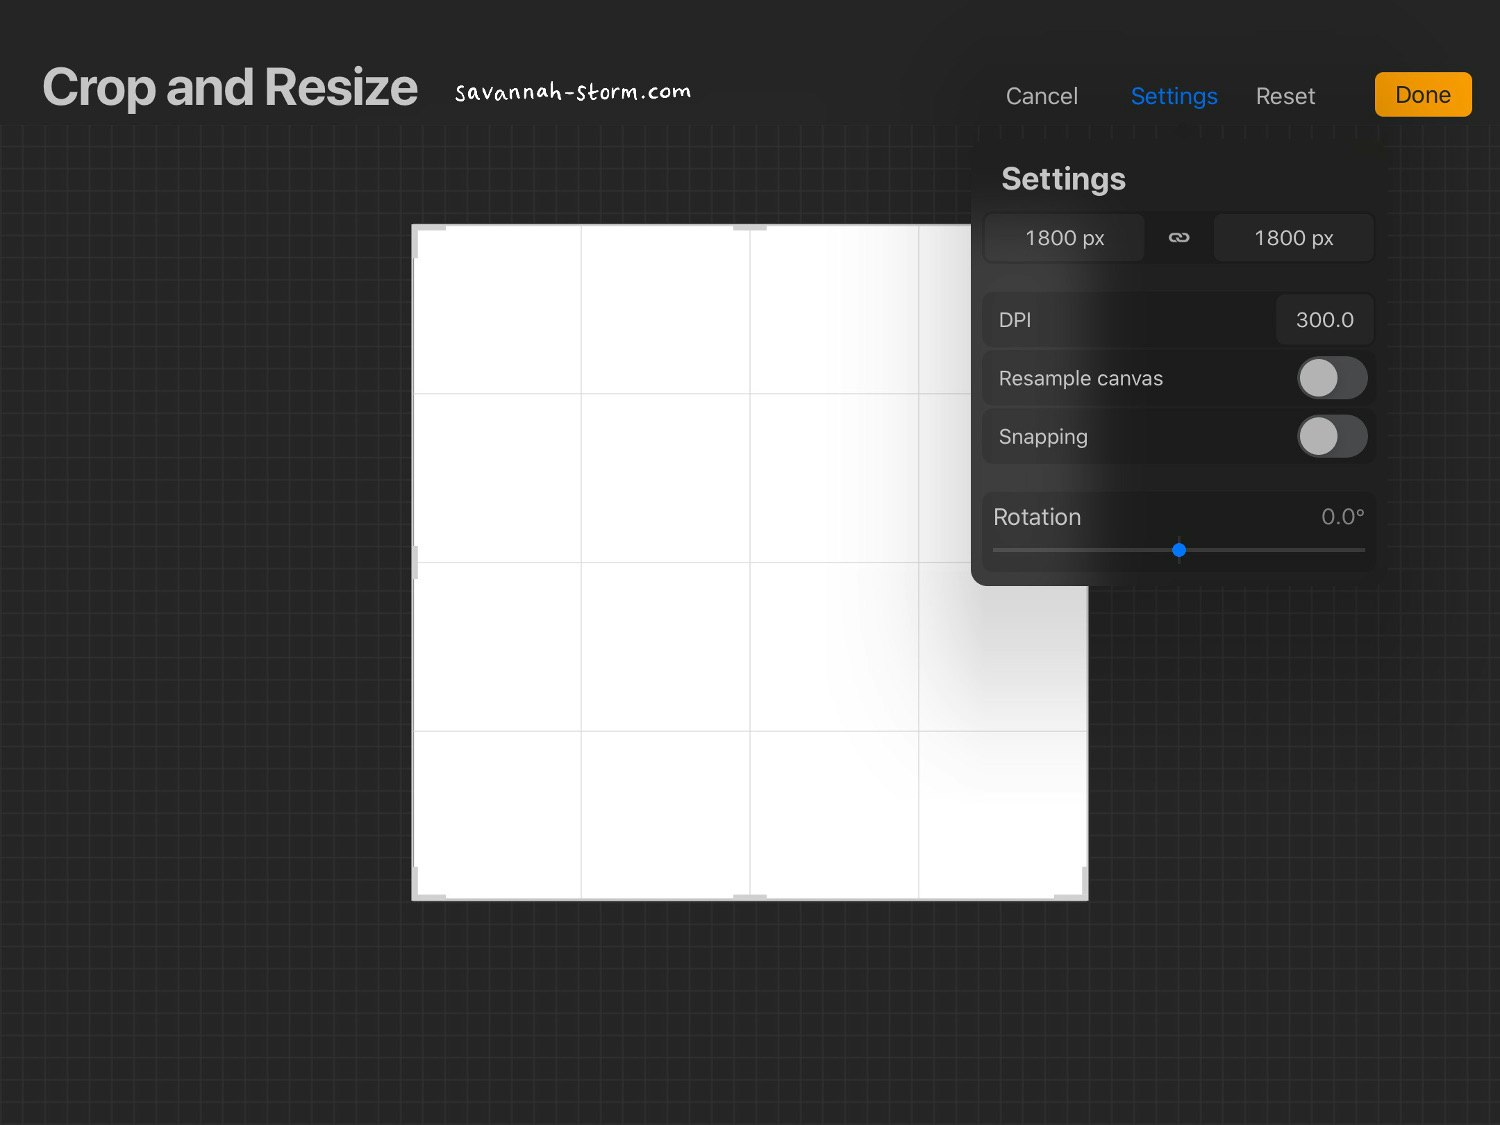
Step 1 - Open a new canvas, making sure it's square. Any size is fine, it just depends how large your elements are. I went for 1800px at first but later increased it to 2000px because my elements were larger than anticipated. Also consider at this stage your DPI, 300 for print is probably best as you can always reduce it later for on screen, but you can't increase it later or it'll just be blurry.
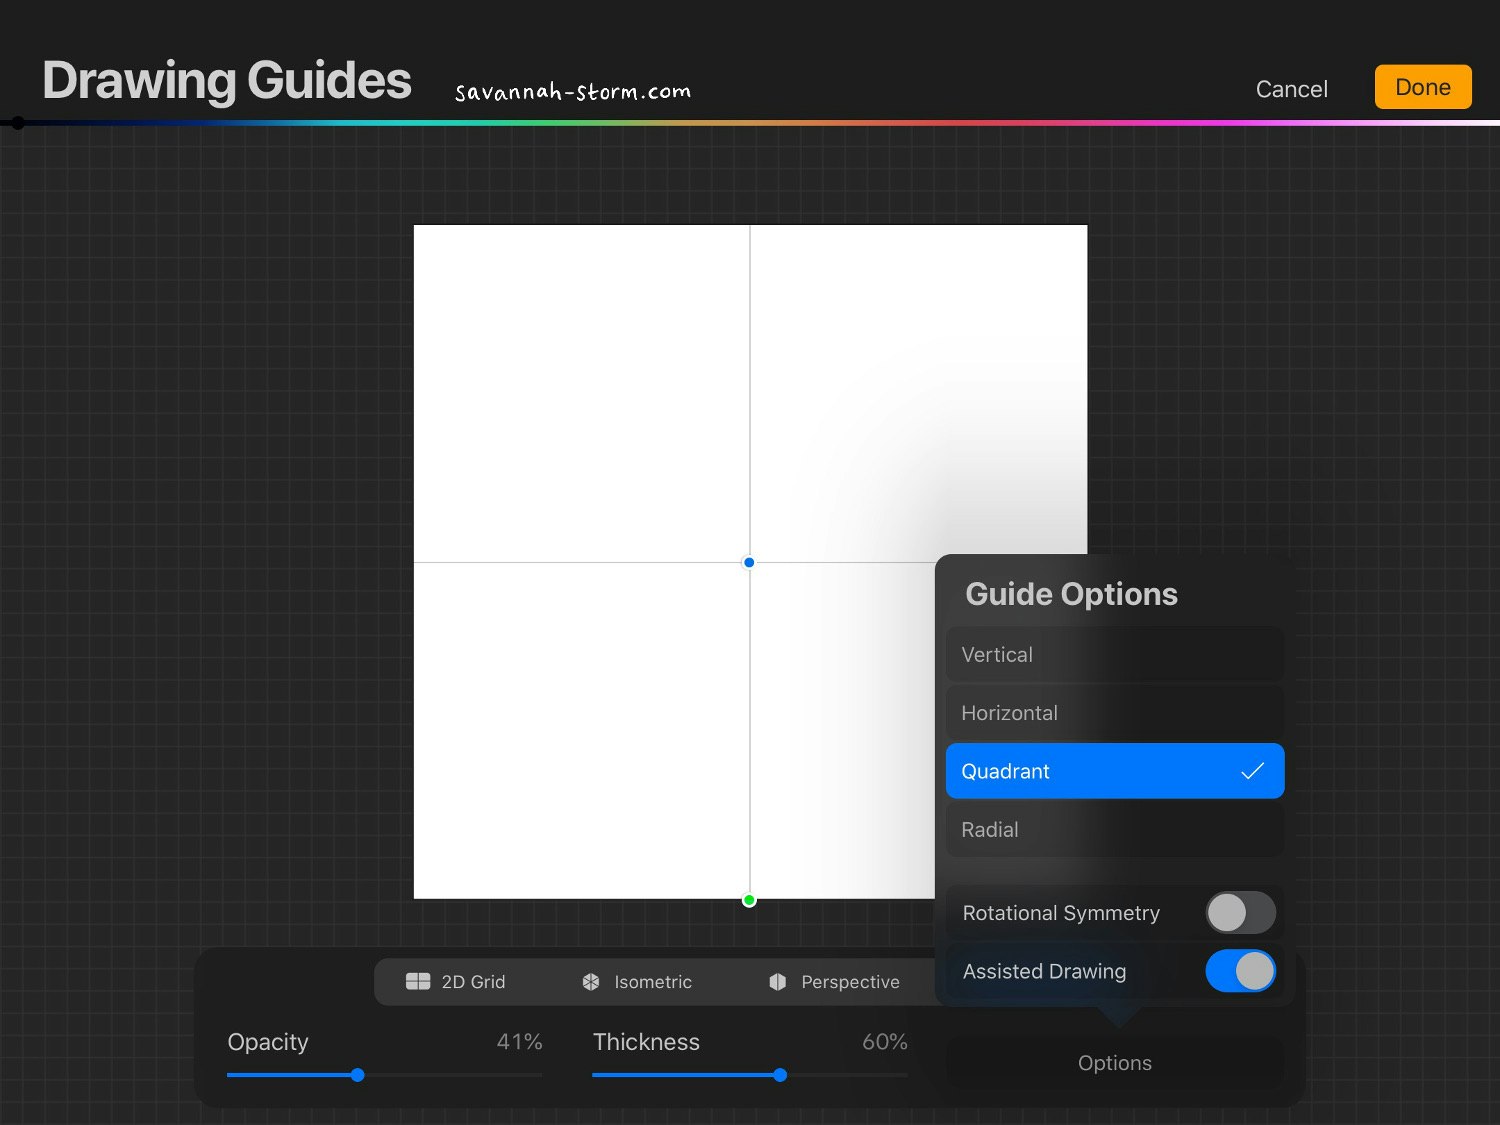
Step 2 - Add a drawing guide from the Actions menu in the top left. Select 'Symmetry' then choose 'Quadrant', and turn off Assisted Drawing. (I took this screenshot before turning it off!) You should now have faint lines dividing your canvas into quarters.
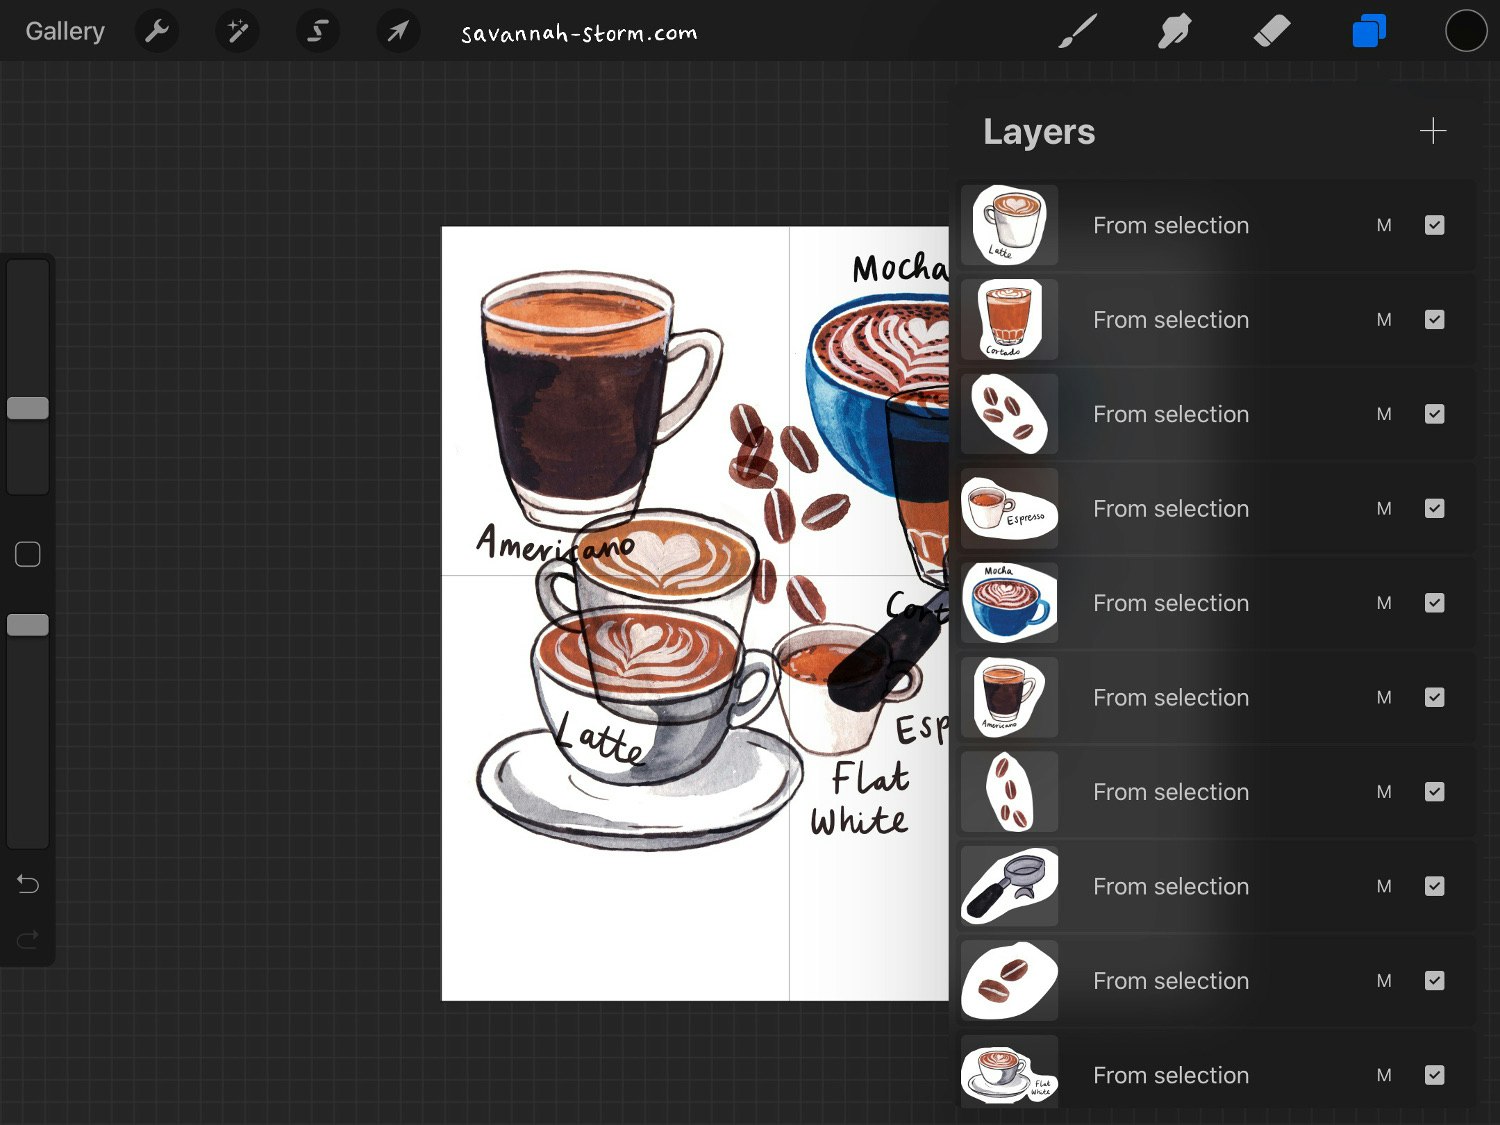
Step 3 - Import your artwork elements by using the Actions Menu > Add > Insert a file, photo, or paste from another Procreate file. Chop the different elements up so they are all on individual layers, and set them all to 'Multiply' - this means the white bubbles where you've cut around them won't be visible. It doesn't matter where they are placed or if they're overlapping at this stage!
This makes a pattern with a white background - much easier as you can just put everything on 'Multiply'. However, if you did want a colour background, you'd just need to spend a bit more time carefully cutting around the images so there was no white bits around them, and then just change your background colour to whatever you like. This is a bit fiddly to do so I haven't shown it in this tutorial, but can be worth the time to have your desired background colour.
Step 4 - Now use some of the elements and start to arrange them, making as close to a cross shape as possible using the Drawing Guide we set up earlier as a guide. As you can see I've placed elements in the centre, but left the corners of the canvas blank. You may need to do some trial and error and come back to this stage and tweak things to get everything where you want it in the end.
The other so far unused elements should just be left with visibility off for now, we'll need them in a sec.
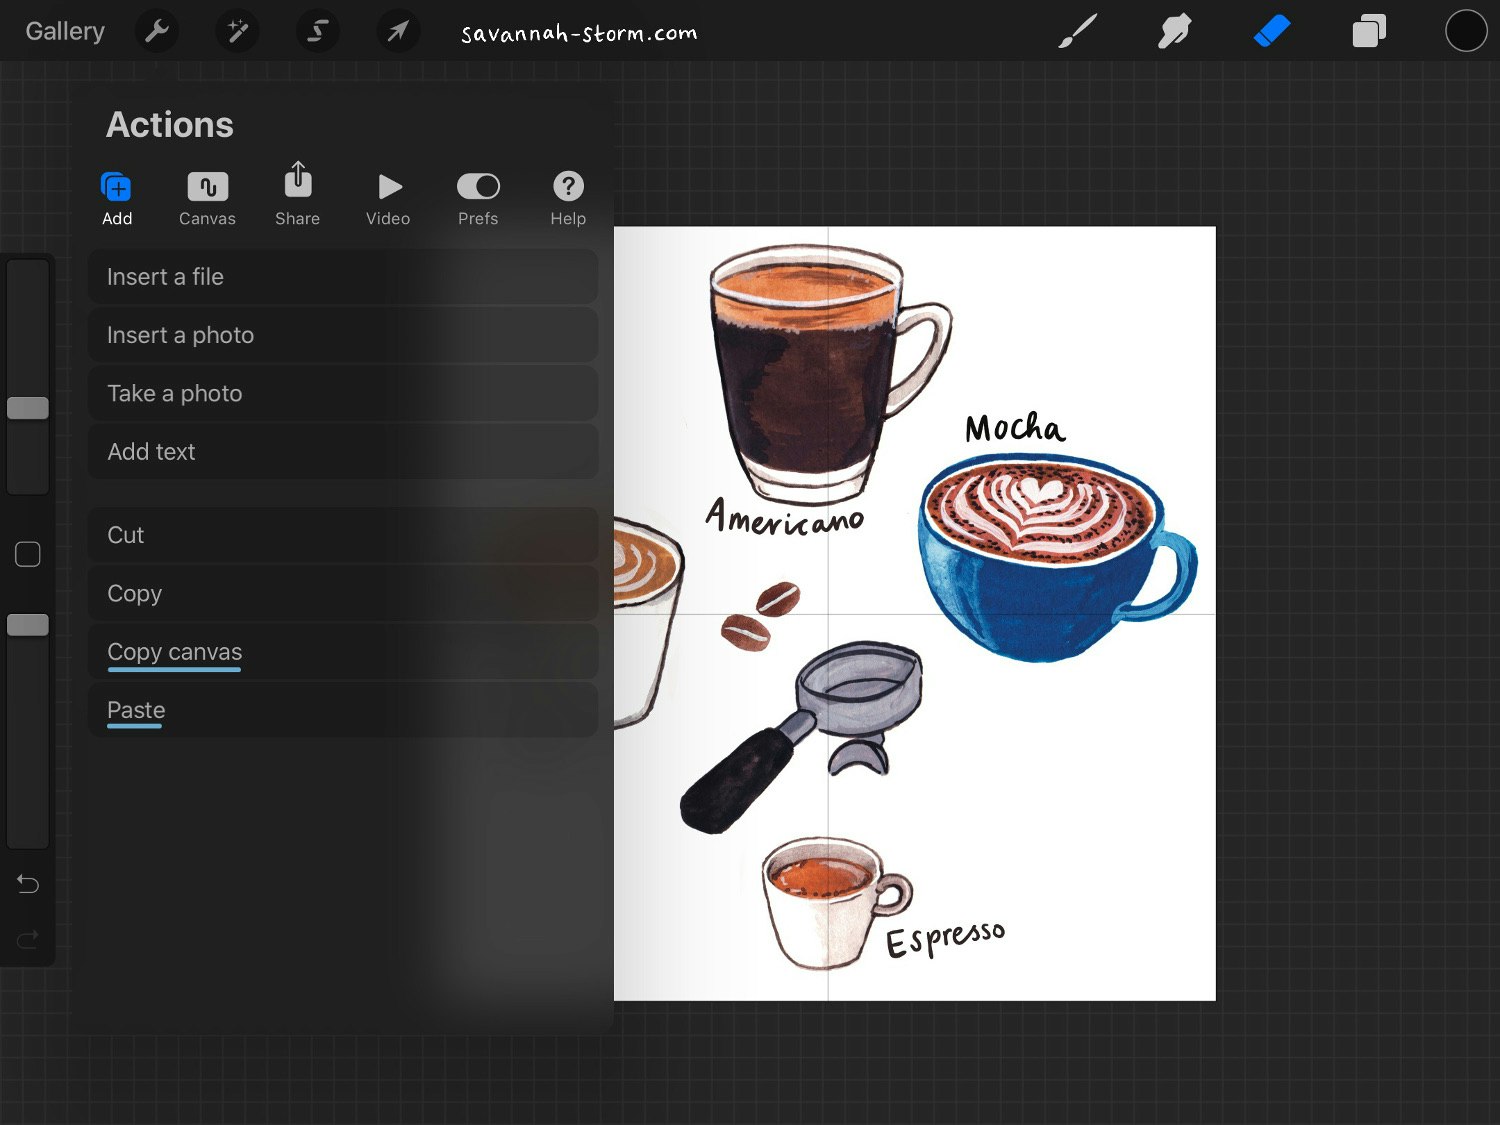
Step 5 - Select the Actions Menu, Copy Canvas, and then Paste.
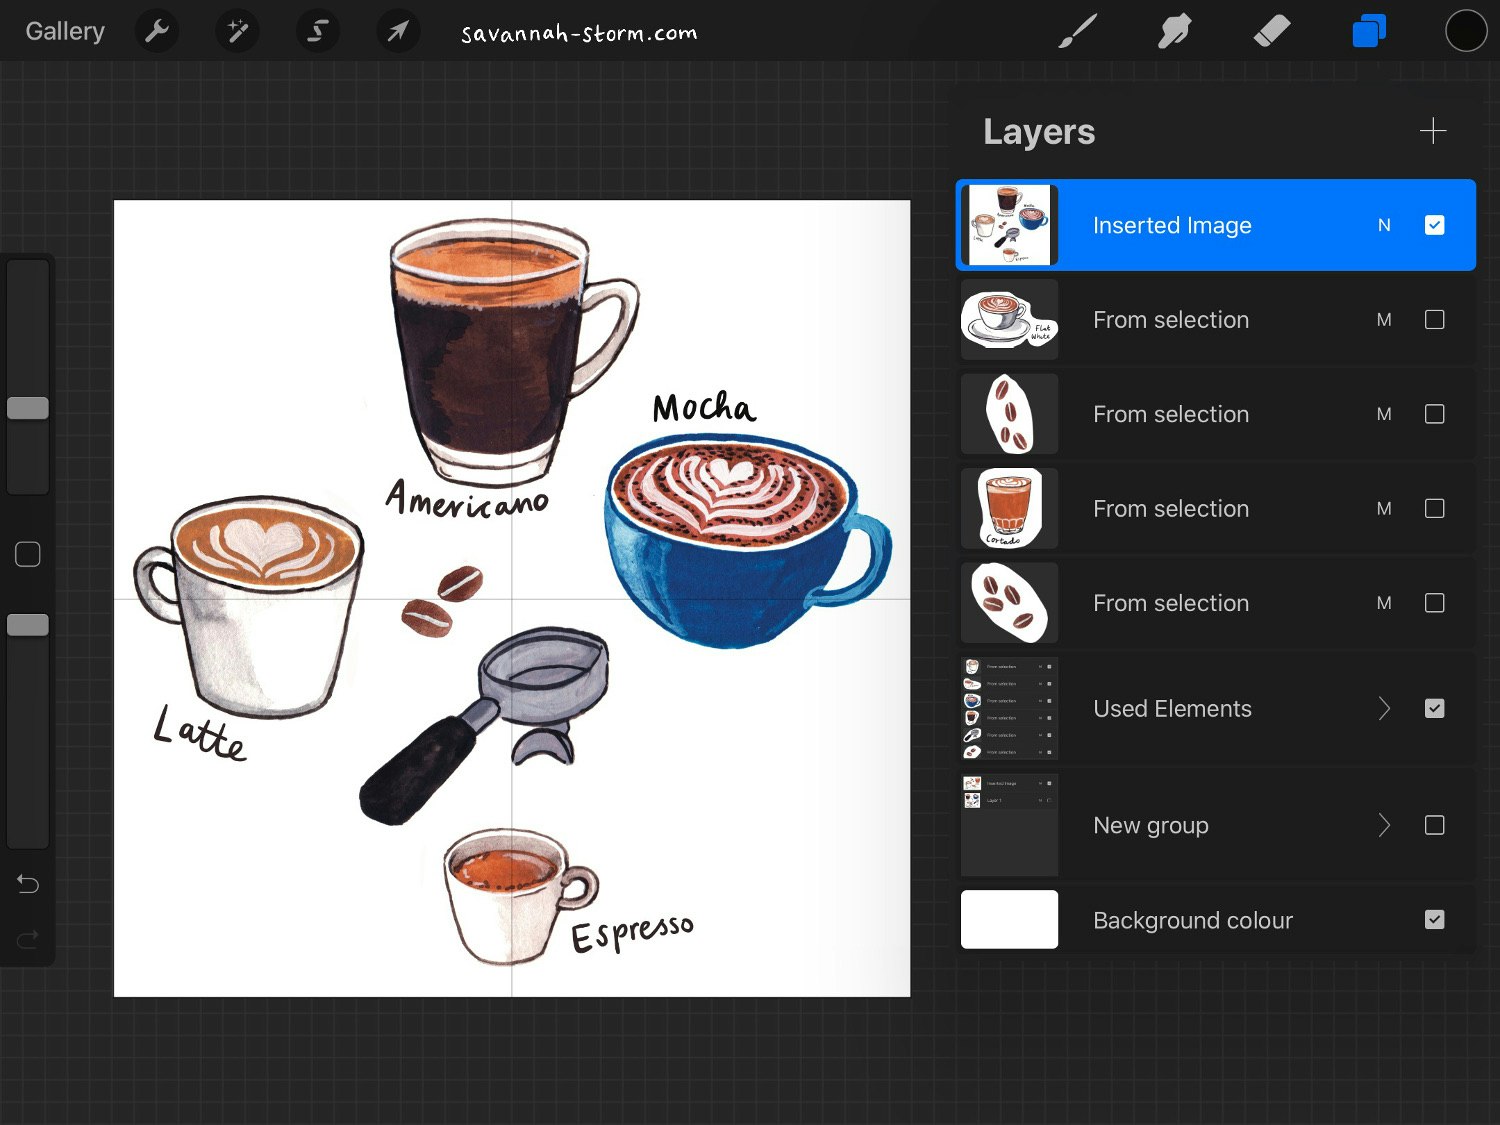
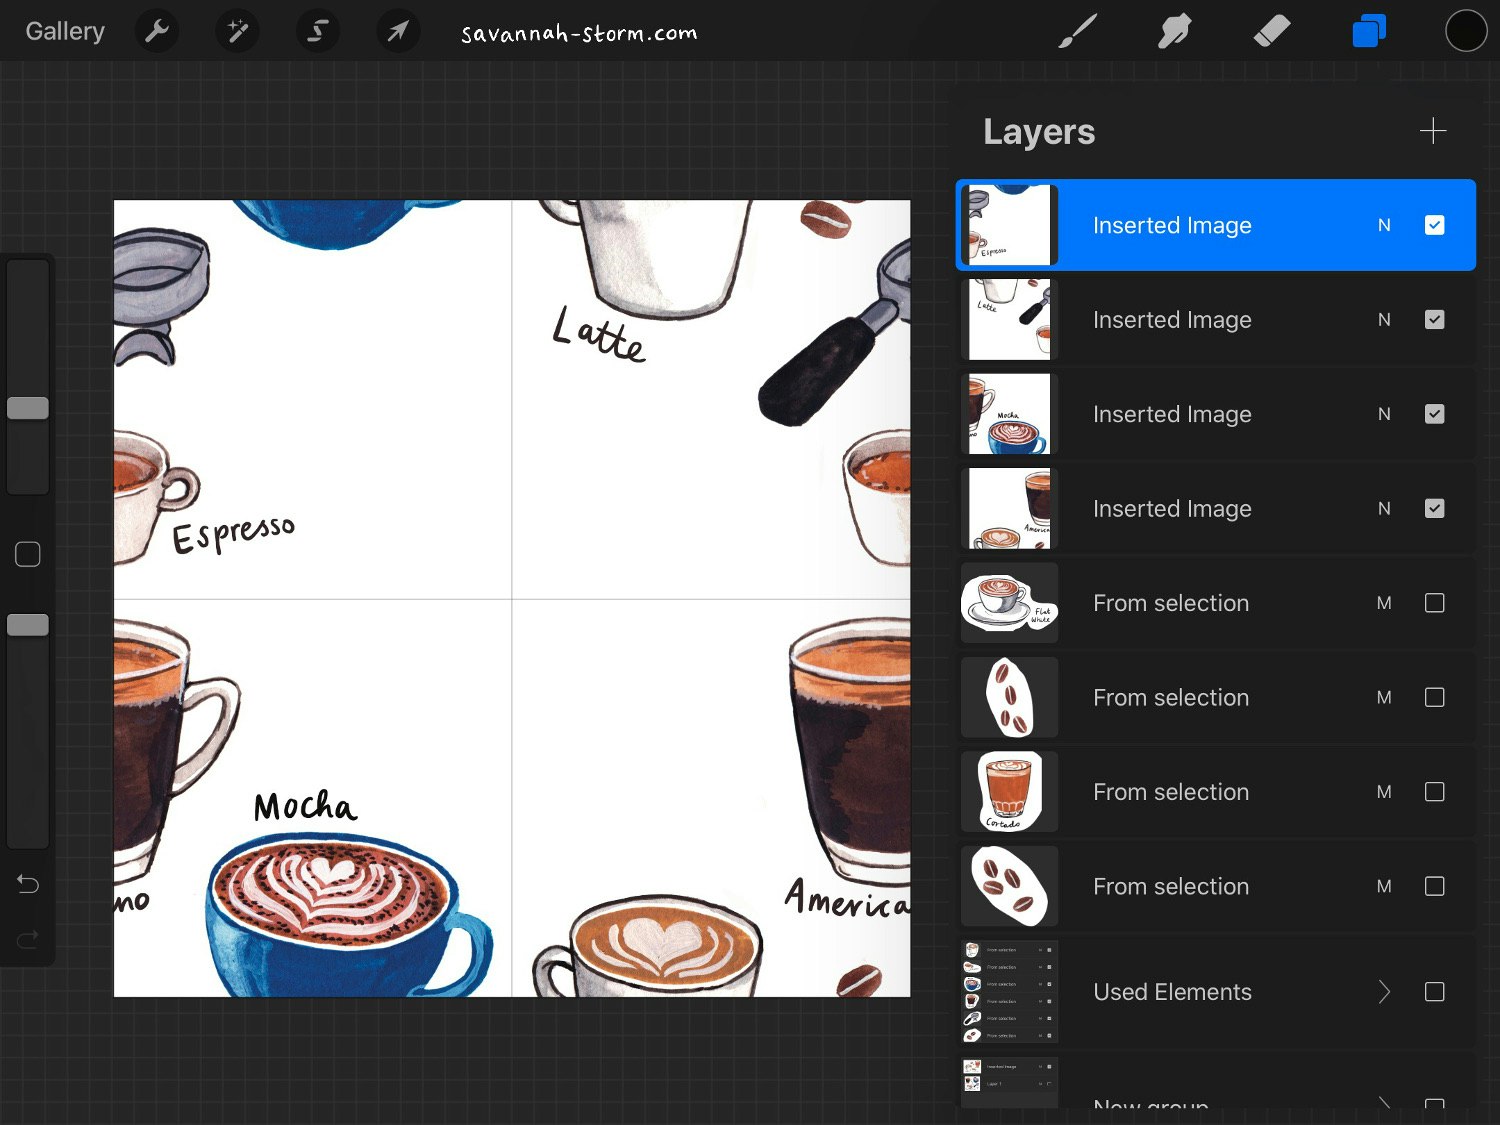
Step 6 - Pasting the copied canvas should have made a new layer called 'Inserted image'. Next, turn off visibility of all other layers, by unticking the little boxes on the right of the layer name. For organisation, I made all the layers containing elements I'd already used into a group, just so I didn't end up using elements twice.
Step 7 - Duplicate the 'Inserted Image' layer so you have 4 copies in total of that layer. Press the 'Transform' arrow, and firstly make sure you have 'Snapping' enabled in the bottom left. This is very important as we need the layers to 'snap' to our drawing guide so that there's no gaps in the repeat.
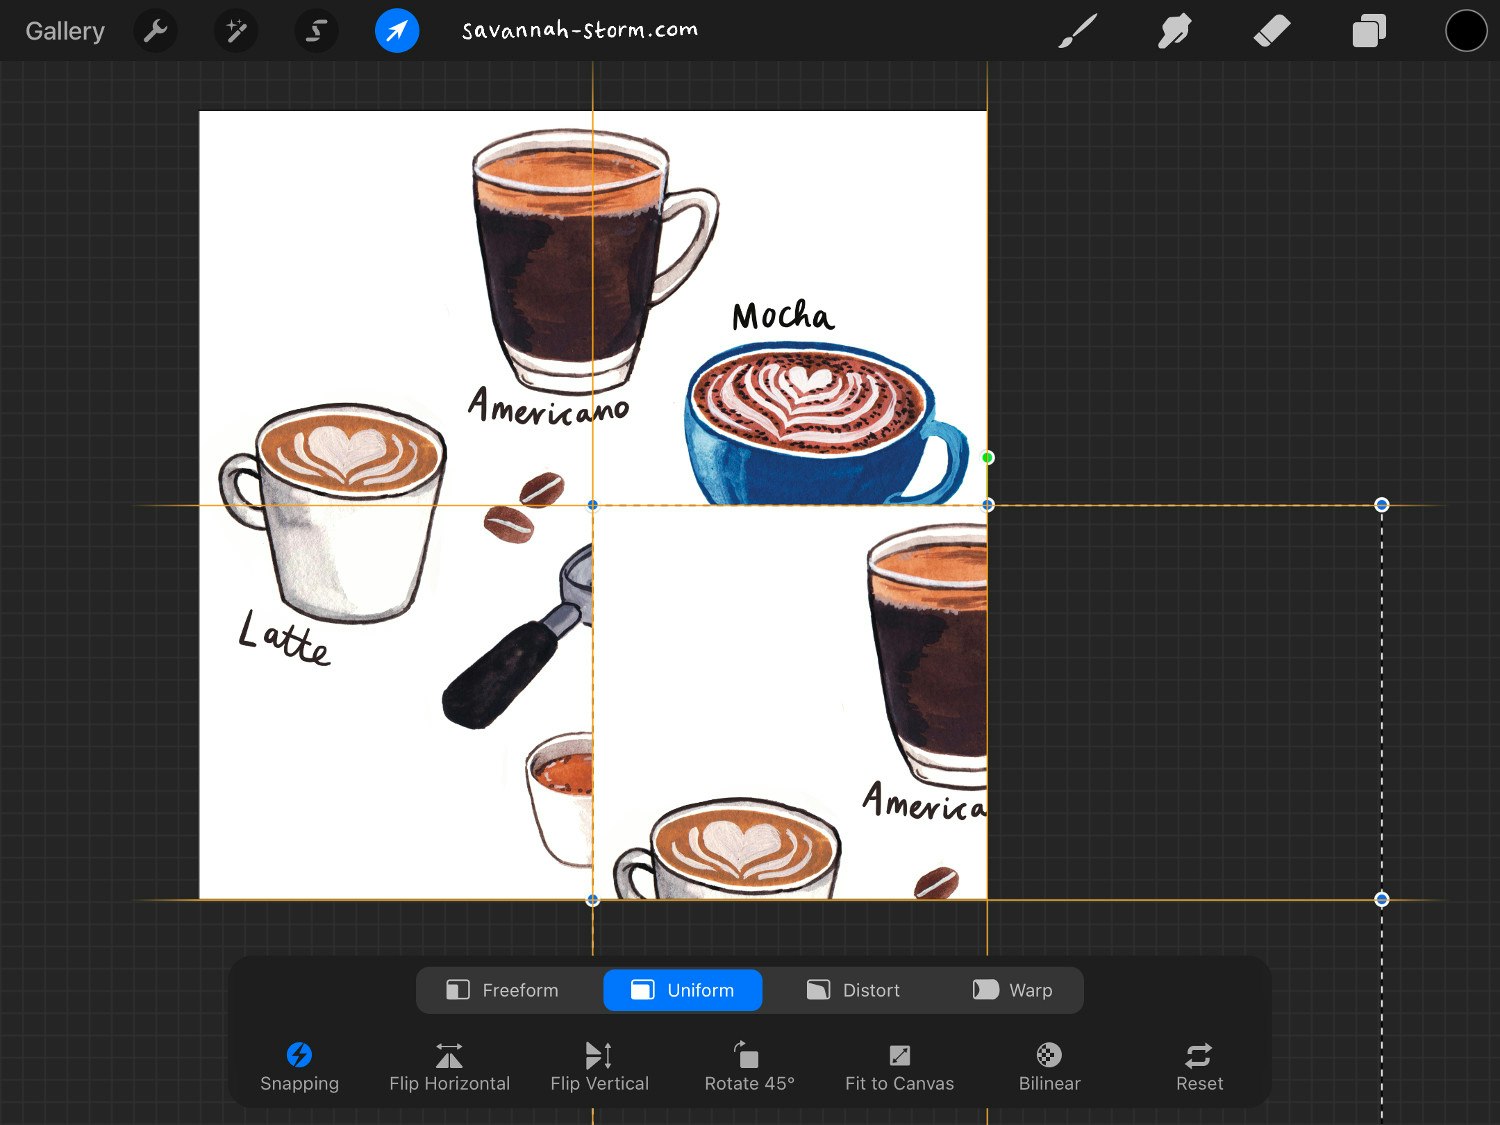
Starting with the first of the 4 'Inserted Image' layers, drag the image down to the bottom right, so the top left corner snaps to the centre of the canvas. The lines light up orange/yellow when it's perfectly aligned.
Step 8 - Then we're going to do the same with the other 3 layers, but each to a different corner of the canvas. As you can see this crops the layers, so we've now made 4 new quarters, arranged so the image is inverted. This means the elements we placed before are now around the edges, and the blank space is now in the centre - ready to fill with the rest of the elements!
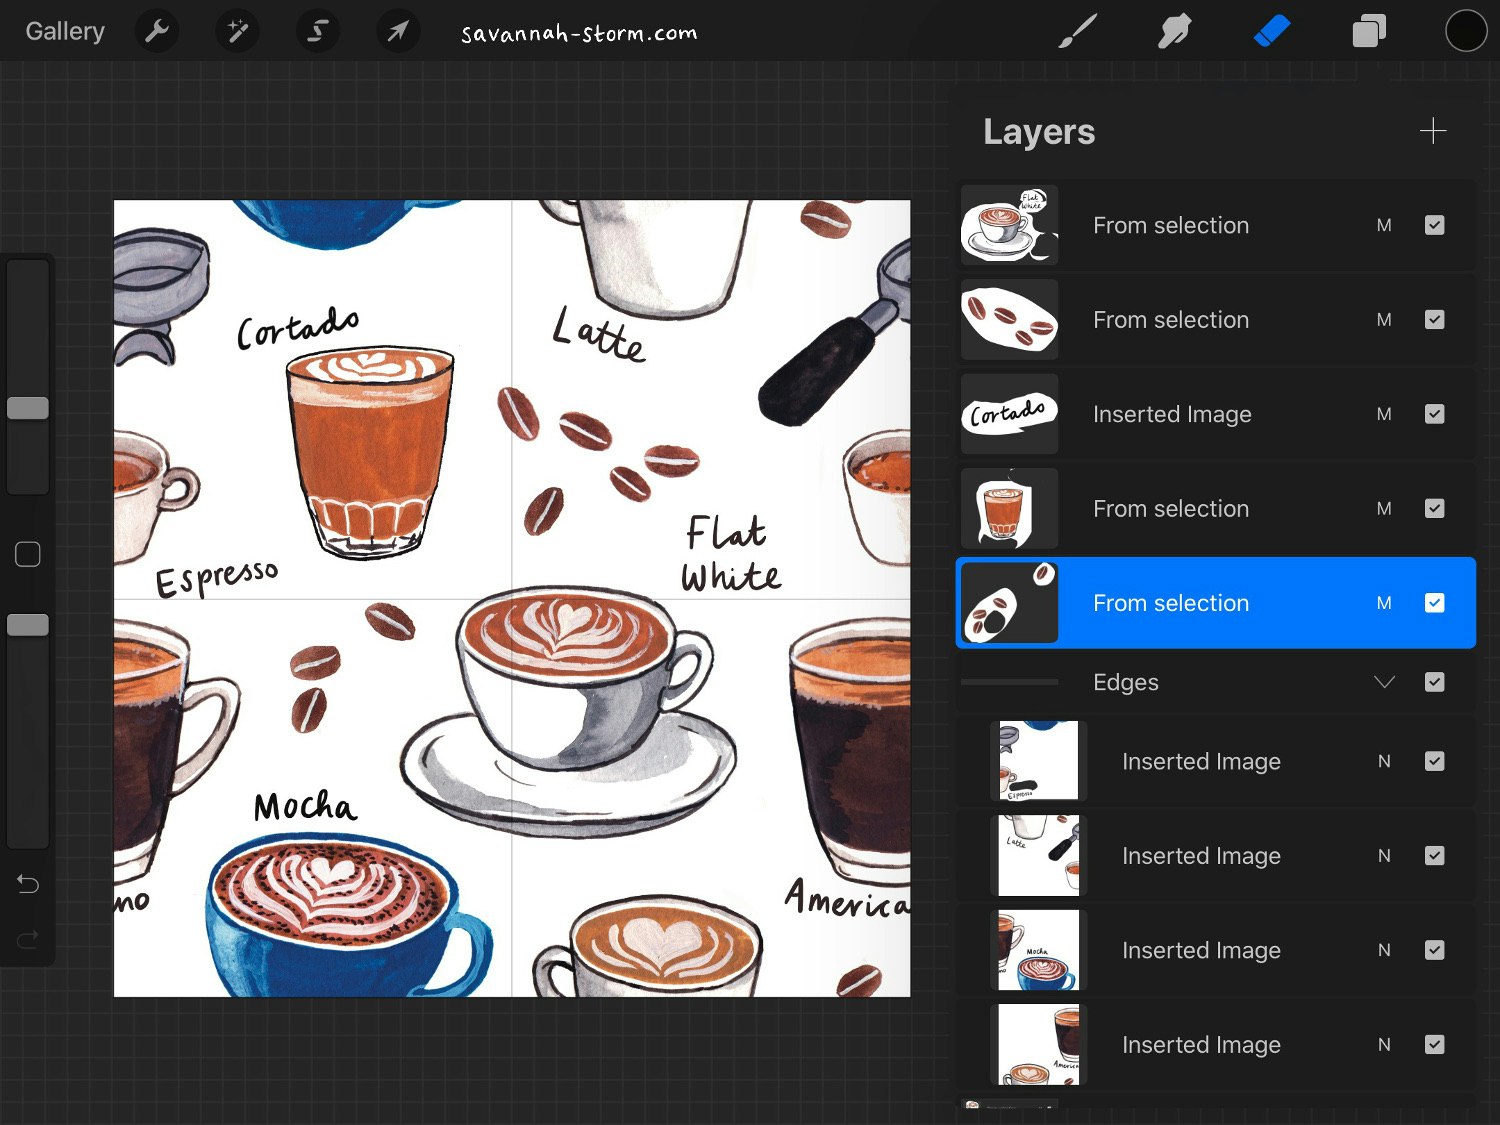
Step 9 - Use the rest of the elements that were left over earlier to fill the blank space in the centre. I usually find this is where little elements (like the coffee beans in my pattern) come in useful as the blank space can be oddly shaped due to the negative space of the elements around the edges. This is the finished tile which will repeat perfectly!
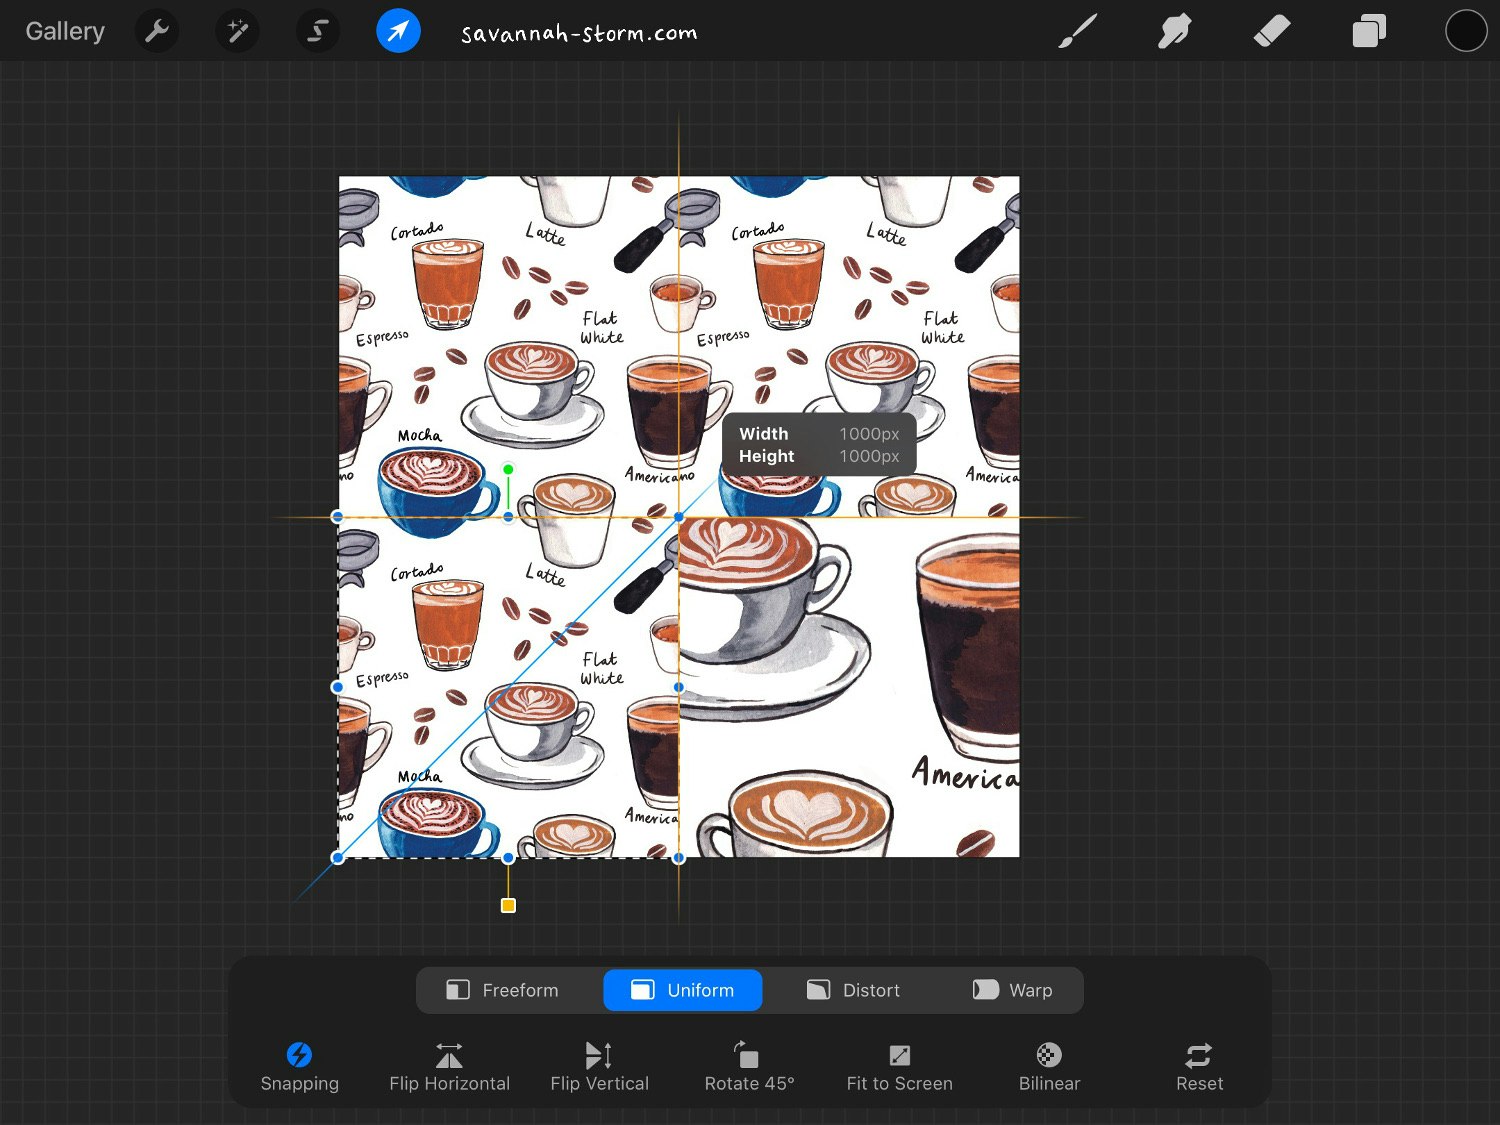
Step 10 - To test your repeating tile, make 4 copies again in the same way we did before - Copy Canvas, Paste makes a new layer, duplicate the layer 4 times. This time though, making sure 'Uniform' is selected at the bottom menu on Transformation mode, shrink each layer to half the size (my canvas is 2000px square, so 1000px for me) and as you do this again the snapping should put them in the correct place.
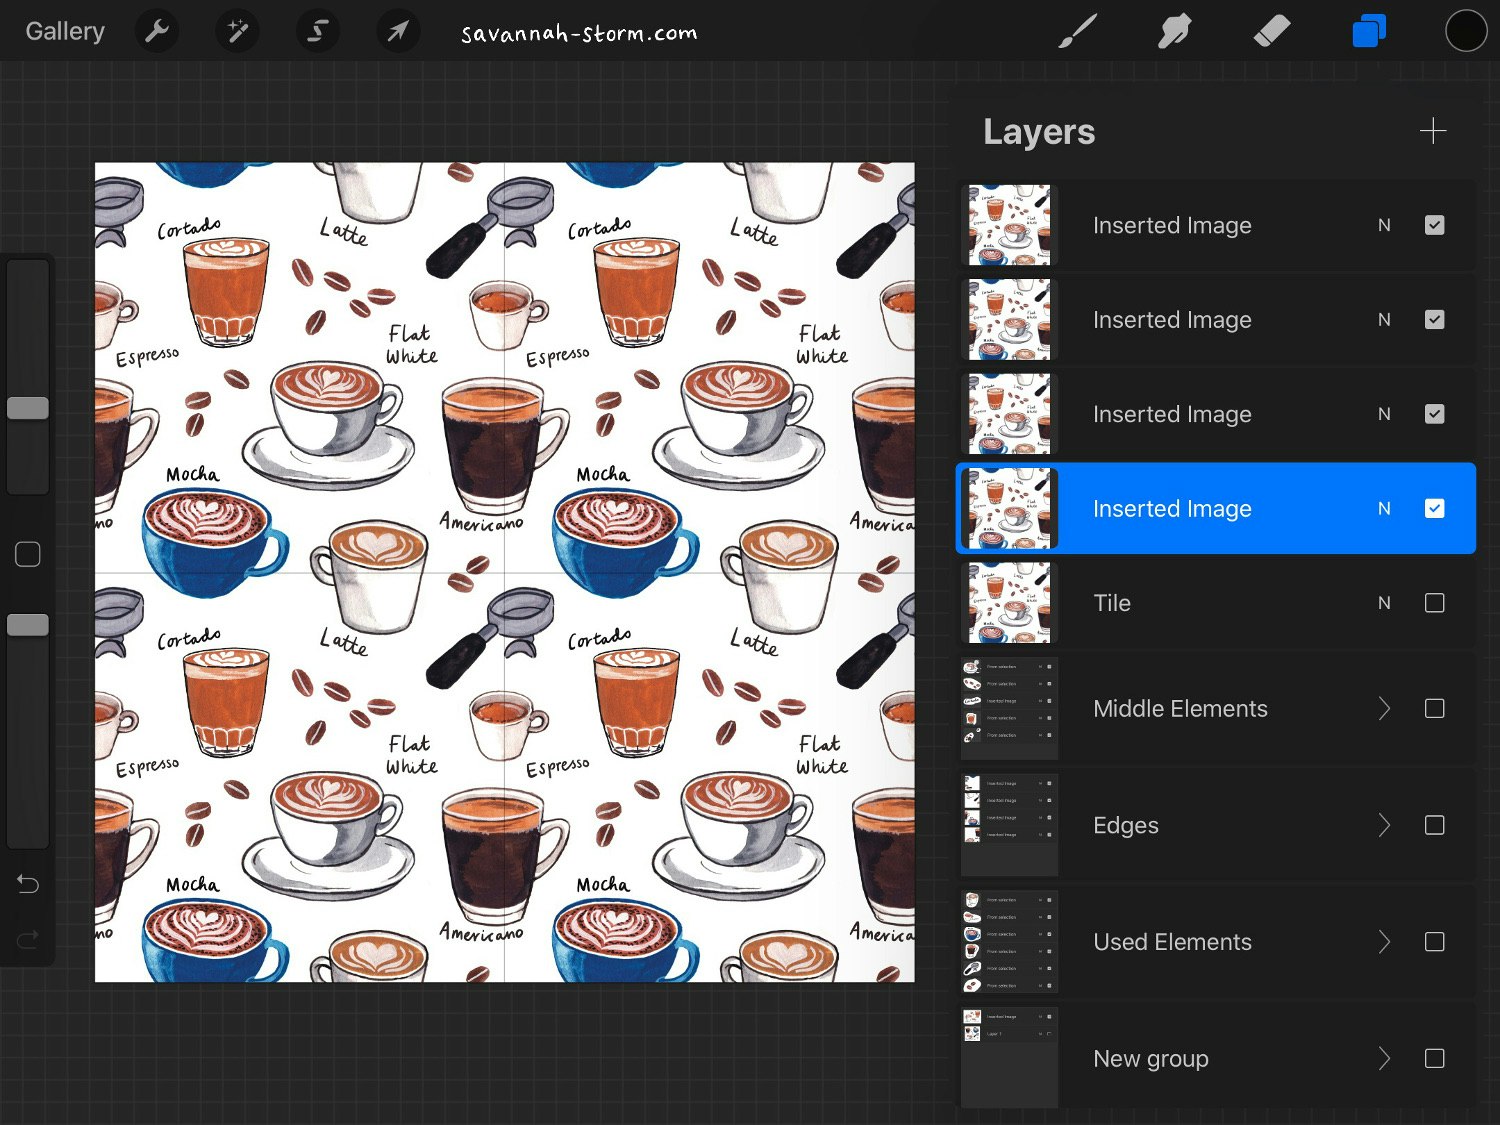
All finished! The pattern should repeat seamlessly with no white lines in between the tiles (turn the drawing guide off to check) and is so useful for printing textiles, or any surface pattern design projects.
See more of my illustrated repeat pattern designs here!