

It's so easy to make your own sketchbooks, especially mini booklets like these that are perfect for a day out sketching! Below are 3 different techniques I use to make booklets, zines and sketchbooks, all easy to put together and don't require any fancy bookbinding, just paper folding.
All you will need is a single sheet of paper, either A4 or A3 size works best (I'd recommend thick watercolour paper if you want to paint in the sketchbook, or around 140gsm cartridge paper for pen & pencil sketches, but any paper is really ok!) plus some scissors. A ruler, cutting mat and craft knife would be useful but not essential!
#1 - Basic Concertina
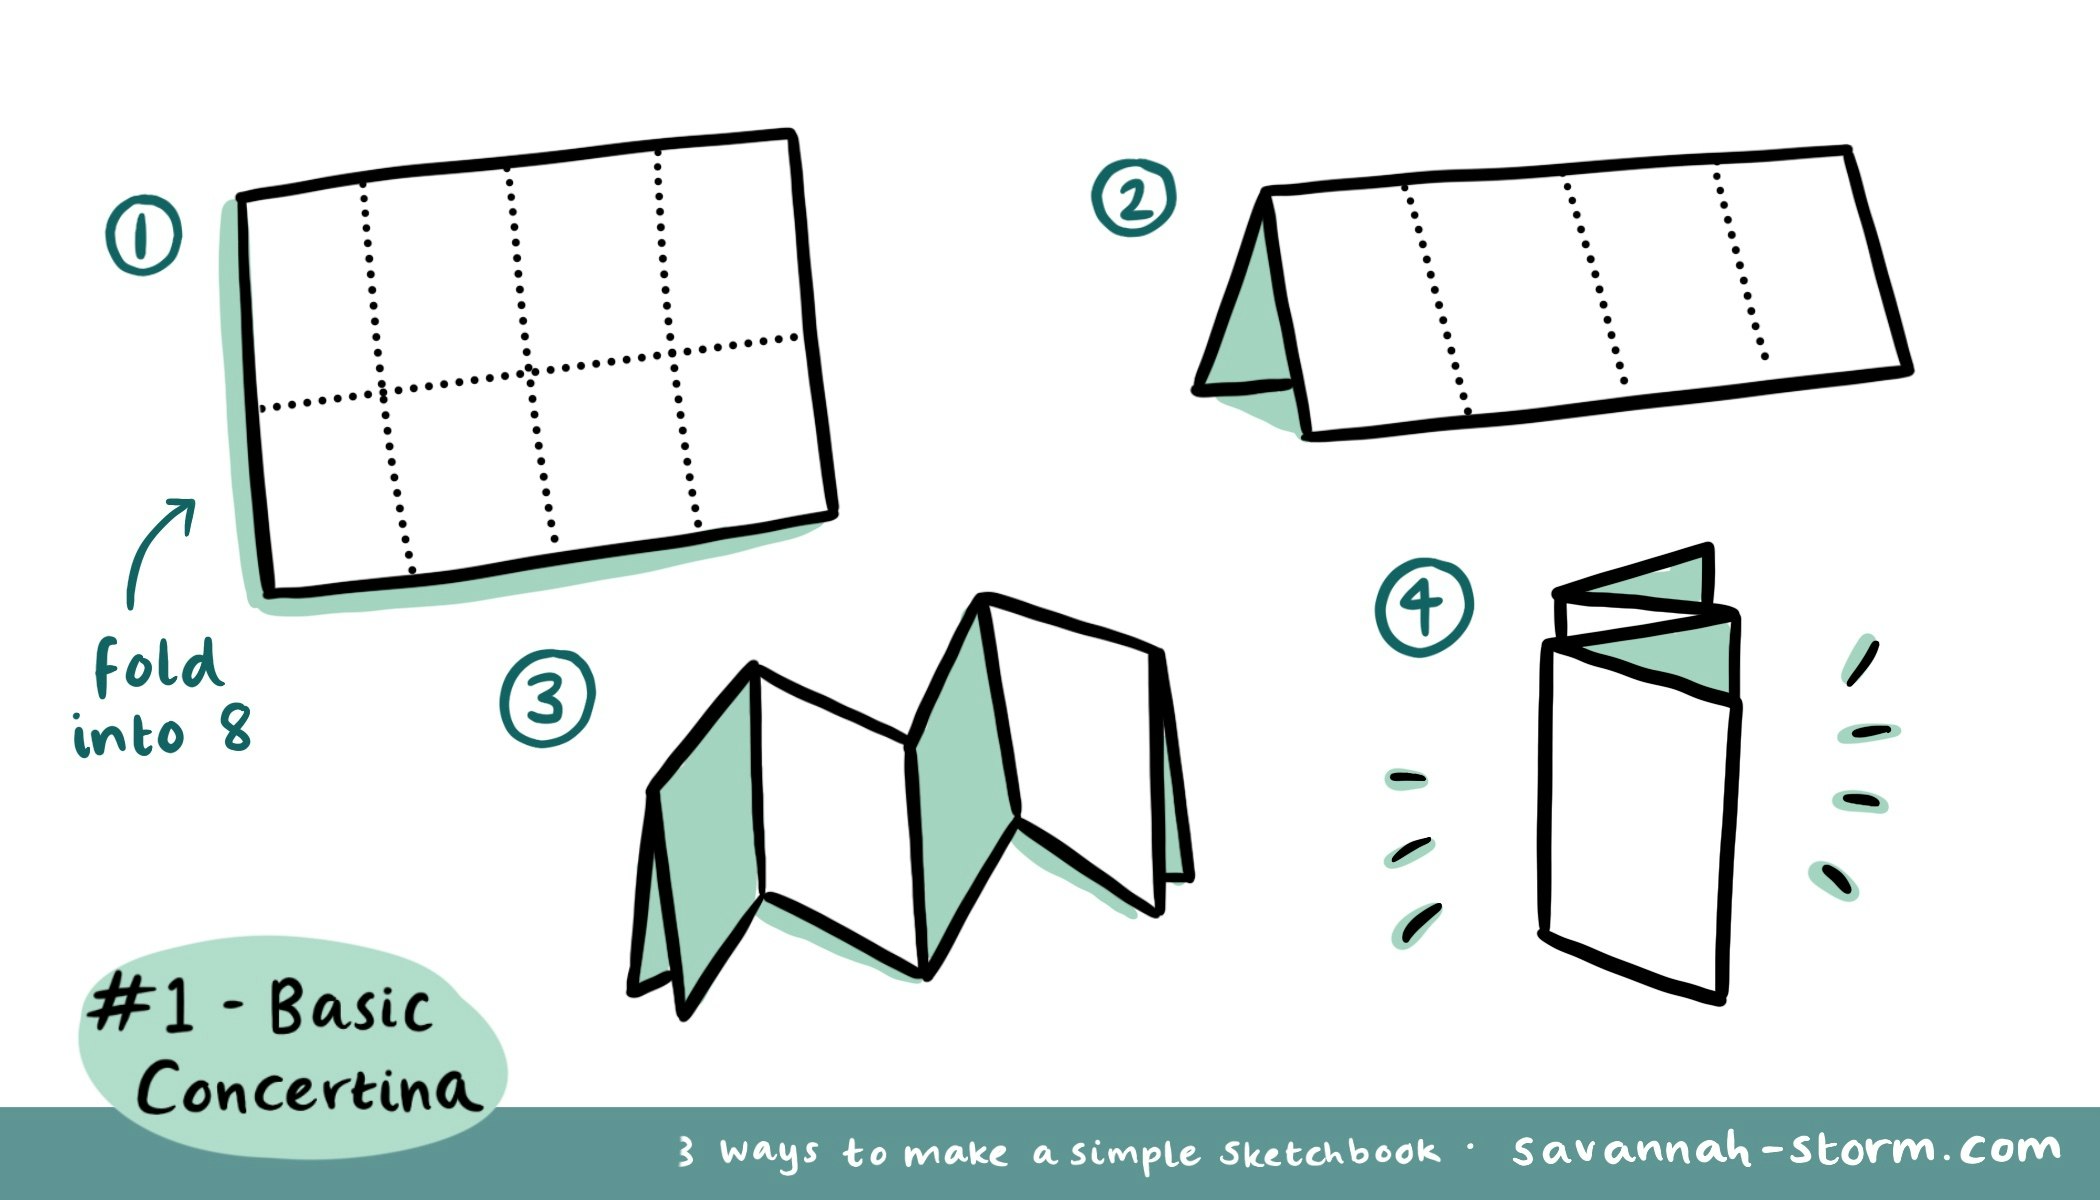
1. Fold the paper into 8 equal sections. This is easily done by folding it in half then half again. Flatten it back out once folded.
2. Fold the paper in half lengthways.
3. Fold the paper into a concertina by folding one way then the other.
4. All done - remember to use both sides of the booklet for sketches!
#2 - Zine Booklet
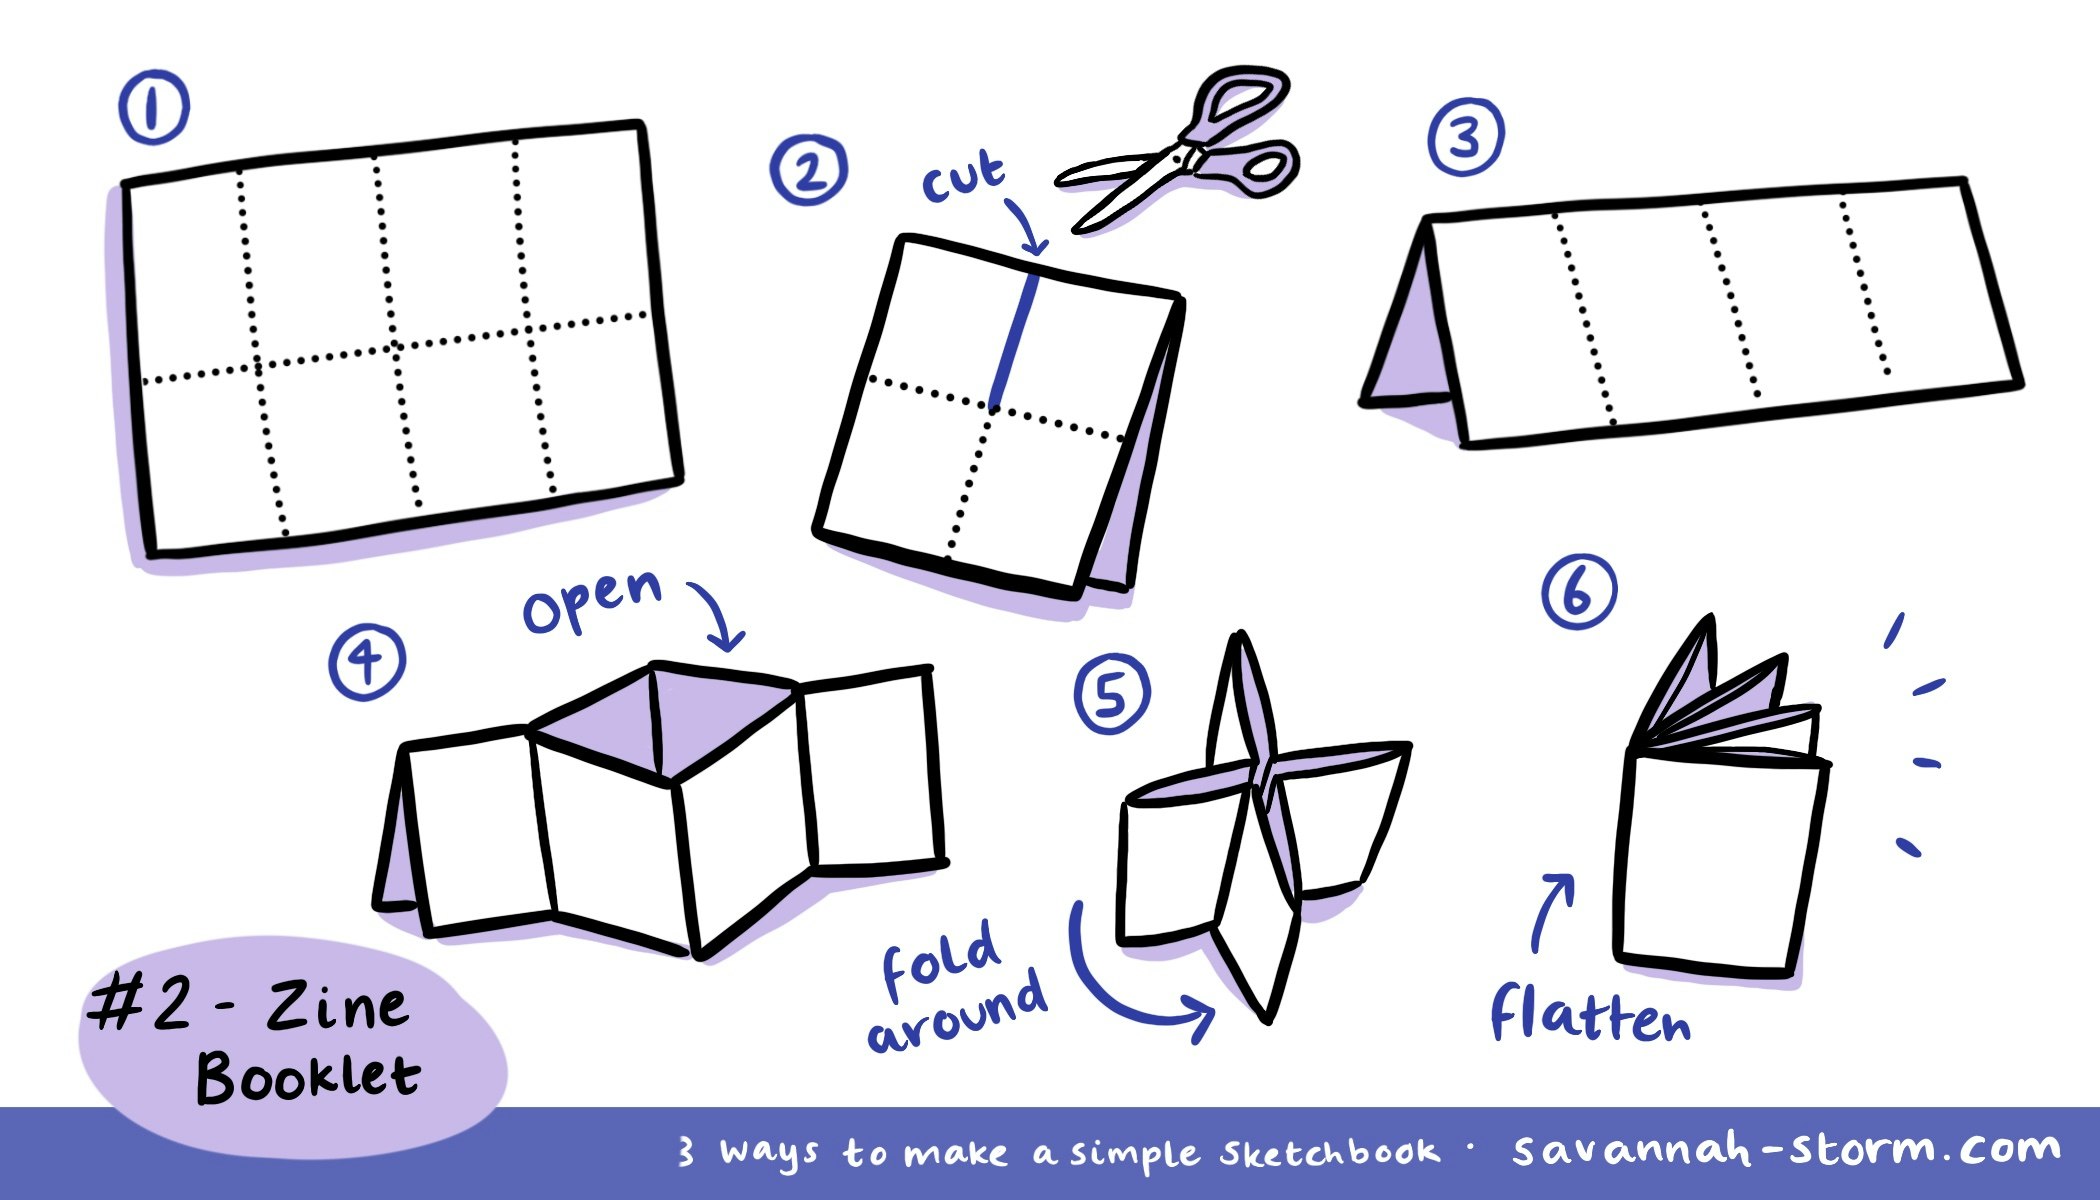
1. Fold the paper into 8 equal sections (half then half again is an easy way to do it without measuring) Flatten back out after folding.
2. Fold the paper in half vertically and cut along the central line, just until you reach the next intersection. (Solid line as shown on diagram) Open paper back out, you should have a slit in the middle of your page.
3. Fold the paper in half lengthways.
4. Open out the slit and fold the pages outwards.
5. Flatten into a cross shape, then fold the pages around into a booklet.
6. All done - the finished booklet may need flattening down!
#3 - Concertina with Cover
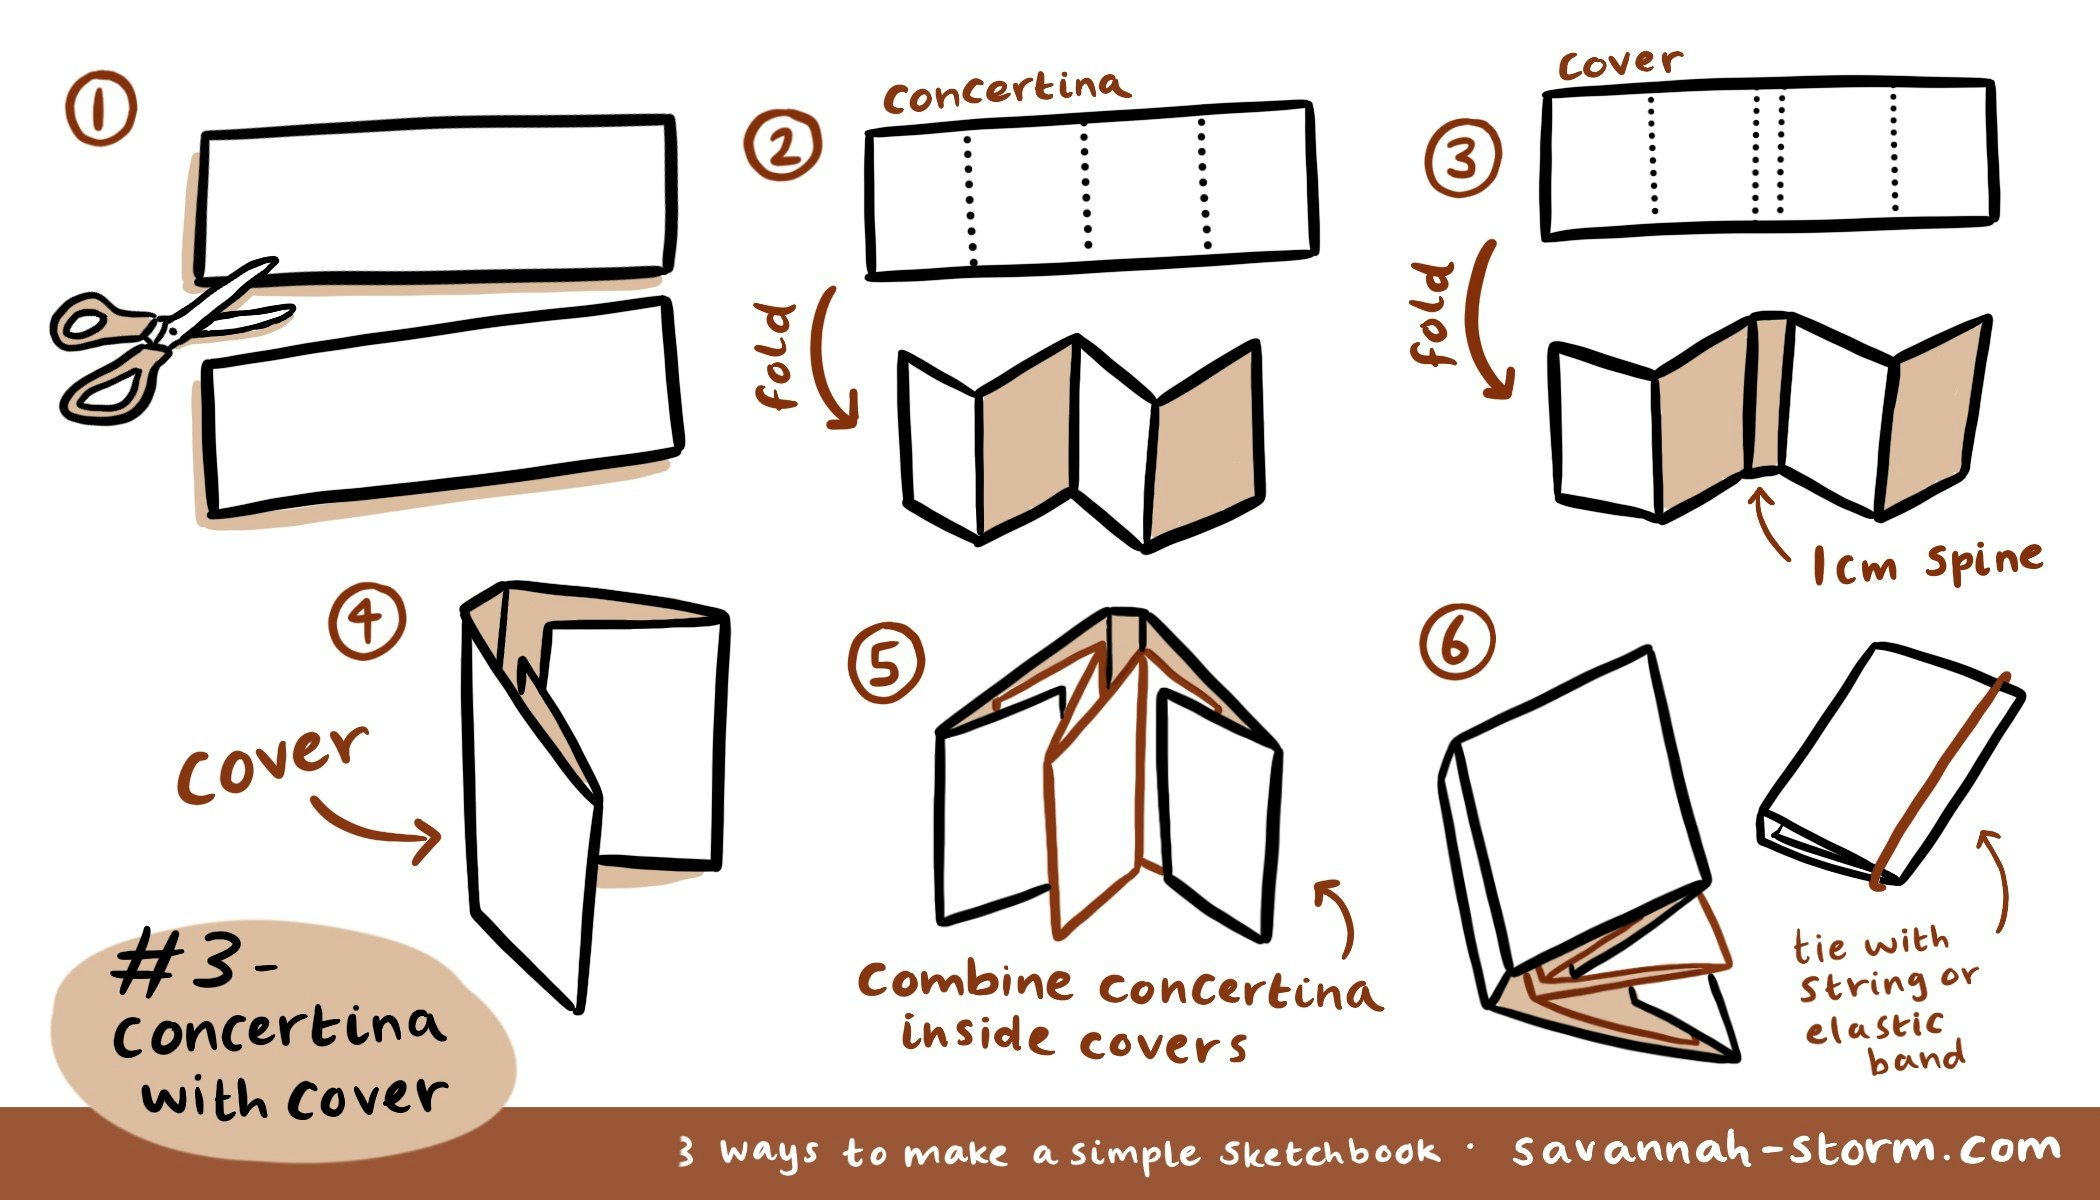
1. Cut paper in half lengthways - either measure before cutting or fold in half to make sure sides are equal width.
2. Use one half to make a concertina, folding into 4, back and forwards folds.
3. Use the other half to make a cover, leaving a 1cm spine in the middle and then folding the sides in half to make the pages. Some measuring may be required at this stage to get the spine correctly in the centre.
4. Fold the cover pages in on themselves to make the cover.
5. Combine the concertina inside the cover by tucking the first and last pages behind the cover sleeves, to hold it in place.
6. All done - optionally tie it closed with string or an elastic band. The cover makes an interesting way to present your sketches - why not make a title page or cover with a map of your walking & sketching route?
If you want some ideas & inspiration to get you started out drawing in your new sketchbook, check out my Drawing Prompts Fortune Teller!